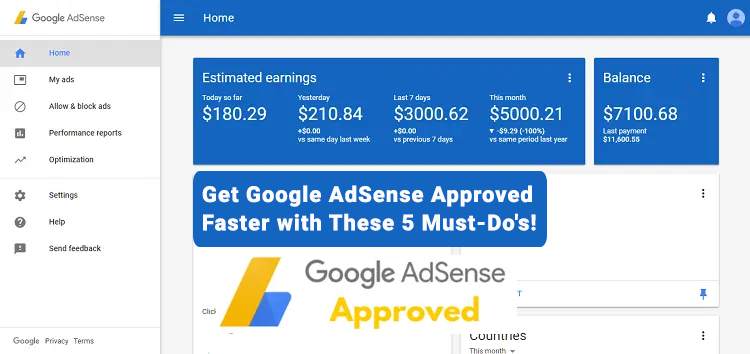
Just Launched a Blog? Get Google AdSense Approved Faster with These 5 Must-Do's!
Let's be honest, every blogger secretly dreams of that sweet, sweet Google AdSense approval. It's like getting a gold star for all the blood, sweat, and tears you poured into your site. Seeing those ads running feels like a validation, right? It fuels that fire to create even more awesome content.
I remember when I first started out, the whole AdSense thing felt like climbing Mount Everest in flip-flops. I knew absolutely nothing beyond the basics of setting up an account. Honestly, the policies seemed designed to intimidate mere mortals like me.
I'd read all these articles about getting accepted, and honestly, they just made me feel worse. Everyone seemed to be talking about massive, established blogs with tons of traffic and super polished content. My little blog felt totally unqualified, like it was trying to crash a party it wasn't invited to. It was overwhelming, to say the least!"
Learn from my mistakes, folks! Save yourself the heartache of those rejection emails landing in your inbox. It's like being told your baby is ugly... but in a super corporate, Google-y way. Ask me how I know? Two denials, that's how!
If you're sitting there feeling unsure about your blog's chances, don't worry. This post is your pre-AdSense checklist. I'm going to share the stuff that I clearly messed up, so you can avoid the same pitfalls. Consider it your crash course in Google AdSense approval. Taught by someone who failed a few times (so you don't have to!).
Why Google Adsense?
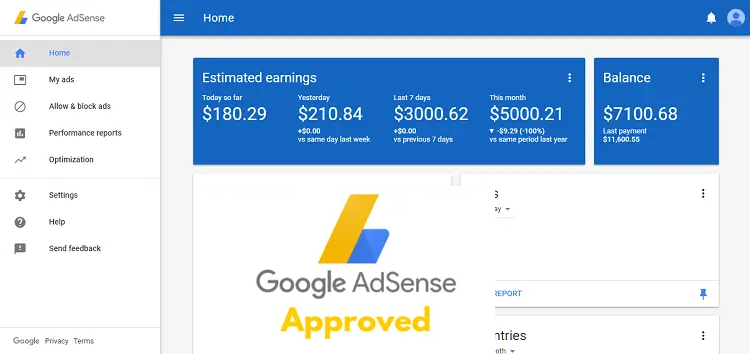
Let's face it, when it comes to making money online, Google AdSense is the OG. It's been around forever, and it's still the go-to ad network for so many publishers, from small-time bloggers to massive news sites. The way it works is pretty simple: you get paid for every click people make on the ads displayed on your site.
You probably see YouTubers talking about AdSense all the time. They're sharing their approval stories, revealing how much they're earning, and generally singing its praises. And you know what? That kind of real-world feedback speaks volumes. AdSense has thousands upon thousands of loyal users who swear by it. It's definitely legit!
But even before YouTube blew up, there were tons of bloggers out there building entire careers (and bank accounts!) thanks to their blogs and Google AdSense. They're living proof that it can be done. And if we put in the work, follow the rules, and create awesome content, there's no reason why we can't achieve that kind of success too. Let's do this!
AdSense Approval Checklist: Must-Do Steps Before You Apply!
1. Ditch the Freebie: Go Self-Hosted and Own Your Domain
Okay, listen up: This is a non-negotiable. You cannot get approved for Google AdSense with a free blog. I know, it might seem tempting to start with a free option, but think of it like trying to build a house on someone else's land! You'll never truly own it. Google AdSense requires you to have a self-hosted site (or a premium upgrade to a paid blog platform) to even be considered. It's a core requirement, and there's no way around it.
Think of it as showing Google you're serious about blogging and willing to invest in your own success.
I dive into the nitty-gritty details about free blogs, self-hosted sites, and domains in my blogging resources series. But trust me, getting your own self-hosted site is the first and most important step toward your AdSense dreams!
2. Don't Scare Visitors Away! Pick a Template That's Easy to Navigate
Think about it: If visitors land on a blog that's a total hot mess – clunky, confusing, and visually unappealing – they're going to bounce faster than a rubber ball. And guess what? Google AdSense notices that kind of stuff. Sites that are difficult to navigate are a big red flag. Remember, blogs are all about sharing information, so your design needs to be crystal clear and easy on the eyes.
Now, does that mean you need to shell out big bucks for a fancy premium template right away? Absolutely not! I'm a firm believer in starting simple. If you're using WordPress, you're in luck! There are tons of amazing free themes to choose from that look great and are easy to customize. You can always upgrade later if you want more features, but there's no need to break the bank at the beginning.
Just remember, your blog's design should be a reflection of you and the topic you're writing about. But most importantly, it needs to be easy for people to find what they're looking for. Keep it simple, keep it clean, and keep it user-friendly!
3. Create a Clear Navigation Menu
Google cares deeply about user experience – it's a huge deal to them! That's why having a clear, easy-to-navigate menu is so crucial. Think of it like a well-organized store: you want visitors to be able to find exactly what they're looking for without getting lost or frustrated. A good navigation menu helps readers easily access your content and understand what your blog is all about. It’s the backbone of a great user experience and should not be taken for granted
But here's the kicker: Your AdSense application will actually be reviewed by real humans. They're going to poke around your site and see if it feels like a legit blog or some kind of spammy, robotic mess. So, you need to impress them with a clean, organized, and user-friendly experience. Make it obvious you've put thought and effort into your blog!
So, where do you start? Here are a few essential pages you should create and add to your main navigation menu:
First up: your About page
Look, even if you weren't aiming for Google AdSense, this page is crucial. It's not just a bio; it's your chance to connect with your readers on a personal level. It's where you build trust and show them there's a real person behind the blog. With AdSense in mind, it's also about showing Google that you are who you say you are.
Next up: Roll out the welcome mat with a Contact page
This isn't just a formality; it's about letting your readers know you're accessible and you value their feedback. It shows Google you're serious about building a community and that you're not hiding behind a wall.
Include a way for people to easily reach you: a working email address, social media links (Facebook, Instagram, Pinterest, YouTube), and even a business phone number if you're feeling extra bold. Remember, online spaces aren't truly private – this is about putting yourself out there and connecting with your audience.
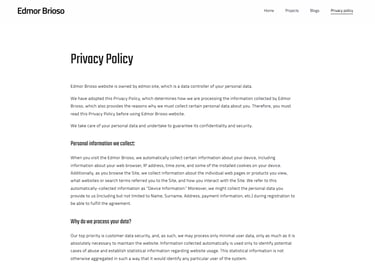
Pay attention, folks, because this is a BIG one: Create a Privacy Policy page
This is often the number one reason why blogs get rejected by Google AdSense, and it's probably what tripped me up the first time around.
Think of it as a contract between you and your readers. It tells them what you'll do with their data, how you'll protect their privacy, and what they can expect when they visit your blog. It's all about transparency and building trust. And let's be honest, it's something Google takes very seriously. In fact, they will most likely reject you if they don't see that you have this on your site!
So, how do you create a Privacy Policy? Don't panic! You don't need to hire a fancy lawyer. There are tons of free privacy policy templates online that you can use as a starting point. Just customize them to fit your specific needs. (Feel free to check out my privacy policy page for inspiration!).

Categorize your content like a pro!
Proper categories are like signposts on a road trip; they help readers easily find what they're looking for and keep them exploring your site longer. And guess what? Google loves that! A well-organized site is a boost for both user experience and SEO, which are both key factors for AdSense approval.
If you're a multi-niche blogger like me, juggling travel and lifestyle content, it's even more important to keep things organized. Separate those categories clearly, then break them down into subcategories to sort your content neatly.
Think of it like this:
Main Category: TRAVEL
Subcategories: Travel Guides, Hotels & Accommodation, Beaches & Resorts, Adventures, Travel Stories
Main Category: LIFESTYLE
Subcategories: Beauty, Food & Drink, Fitness & Health, Events
And to make things even easier for Google (and your readers), stick to generic, easy-to-understand category names. For example:
Subcategories under Beauty: Skincare, Makeup, Tips
4. Quality Over Quantity: Focus on Amazing Content with Basic SEO
Alright, let's get real: This is where the rubber meets the road. Content is king! It doesn't matter how pretty your blog looks or how great your navigation is; if your content is weak, you're sunk.
I know, I know, you might be blogging for fun, just to share your thoughts and experiences. But once you throw monetization into the mix, it's a whole new ballgame. You need to think about what your readers want and how you can provide value to them.
And that's where high-quality content comes in.
Google hates poorly written blogs. Think about it: If your site is riddled with typos, grammatical errors, and rambling paragraphs, it's going to look unprofessional and untrustworthy. Google wants to see content that's well-written, informative, unique, and actually useful to readers. It needs to be original (no plagiarism!), and it must add value to your audience's experience, otherwise, why should they bother reading? It should be well-organized, readable, and error-free!


Okay, let's tackle SEO
I know, I know, it sounds super technical and intimidating. But trust me, you don't need to be a rocket scientist to do some basic SEO magic on your blog posts. And it's totally worth it! Remember, Google pays close attention to the content of your blog before approving it for AdSense.
Basic SEO is all about making your content easy for Google to understand and rank. It means:
Having a blog post title that clearly reflects the content: Think of it as the headline that grabs Google's attention.
Using a good subheading hierarchy (H1, H2, H3, etc.): This helps to organize your content and make it easier for readers (and Google) to scan.
Creating short and precise permalinks: These are the URLs for your blog posts. Keep them short, sweet, and relevant.
Properly categorizing your content: This helps readers (and Google) find related articles.
Adding relevant tags: Think of these as keywords that describe your content.
Using a featured image: A visually appealing image can make your post more attractive.
Writing a compelling excerpt (at least 25 words): This is the short summary that appears in search results and on your blog's homepage.
These optimization options are usually right there on your screen when you're creating a blog post, so there's no excuse for neglecting them. Honestly, I used to ignore them too! But once I learned how much SEO can boost your Google ranking and drive organic traffic to your site, I went back and optimized all of my old posts. And trust me, it made a difference!
5. Alright, listen up, because this is super important: Always, always comply with Google AdSense policies!
Look, at the end of the day, Google cares most about user experience. So, if your site is filled with thin content (pages with little to no original, useful information), and your blog is poorly designed, with a confusing navigation menu, you're practically waving a red flag in Google's face. You have a very low chance of getting approved and they will likely reject you..
Remember, Google wants to see that you're creating a valuable resource for your audience, not just a spammy site designed to make a quick buck. So, make sure you're following their guidelines to the letter!
The Good News:
If you take the time to set everything up correctly, you can speed up the verification process and get your AdSense account fully approved in no time! And trust me, that feeling of finally seeing those ads running on your site is totally worth the effort.
Some Frequently Asked Questions (Because You're Probably Wondering...)
What's the magic number? How many posts do I need before applying?
Ugh, this is the question that haunts every new blogger! There's no official answer from Google, which makes it even more frustrating. I've seen people say you need 30, others swear by 50+, and honestly, it seems to vary a lot.
In my own experience, I had around 25 posts when I launched my blog, and I got approved about 3 months later. But I also know bloggers who have hundreds of posts and are still getting rejected!
So, when's the best time to throw your hat in the ring and apply?
Based on my own experience, I'd recommend waiting until you have at least 20 good quality blog posts, each with 600+ words, that are properly optimized for SEO (see above!). That said, there's no guarantee; every blog is unique and gets reviewed individually by Google. But it’s a good way to improve your chances.
To give yourself the best shot:
Create and set up everything as explained above.
Thoroughly assess the overall user experience on your site to be sure that there's great SEO.
Read the Google AdSense policies carefully to keep you on track.
How old does my blog need to be to get approved? Does it need to be, at the very least, a decade?
That, I can't say for sure. I applied to Google AdSense just a week after launching my blog and got rejected twice in the same month. Then, I was accepted three months later. So, age doesn't seem to be the determining factor.
How long does the Google AdSense approval process actually take?
This is another one of those "it depends" questions. There's no set timeline, but for me, it took around 2 months to get approved, and that was after applying three separate times. Be patient (and persistent!).
A Quick Disclaimer:
These tips and tricks are based purely on my own rollercoaster ride through the Google AdSense application process – the rejections, the tweaks, and finally, the sweet taste of approval.
While I truly believe they'll help you, I can't guarantee a 100% success rate. Every blog is different, and Google's algorithms are mysterious beasts!
But hey, there's no harm in giving it a shot, right? At the very least, you'll end up with a better blog!
Follow these 5 steps, and you'll be well on your way to getting that coveted Google AdSense approval. Get ready to start earning.
Copyright © 2025 EDMOR BRIOSO | All rights reserved.